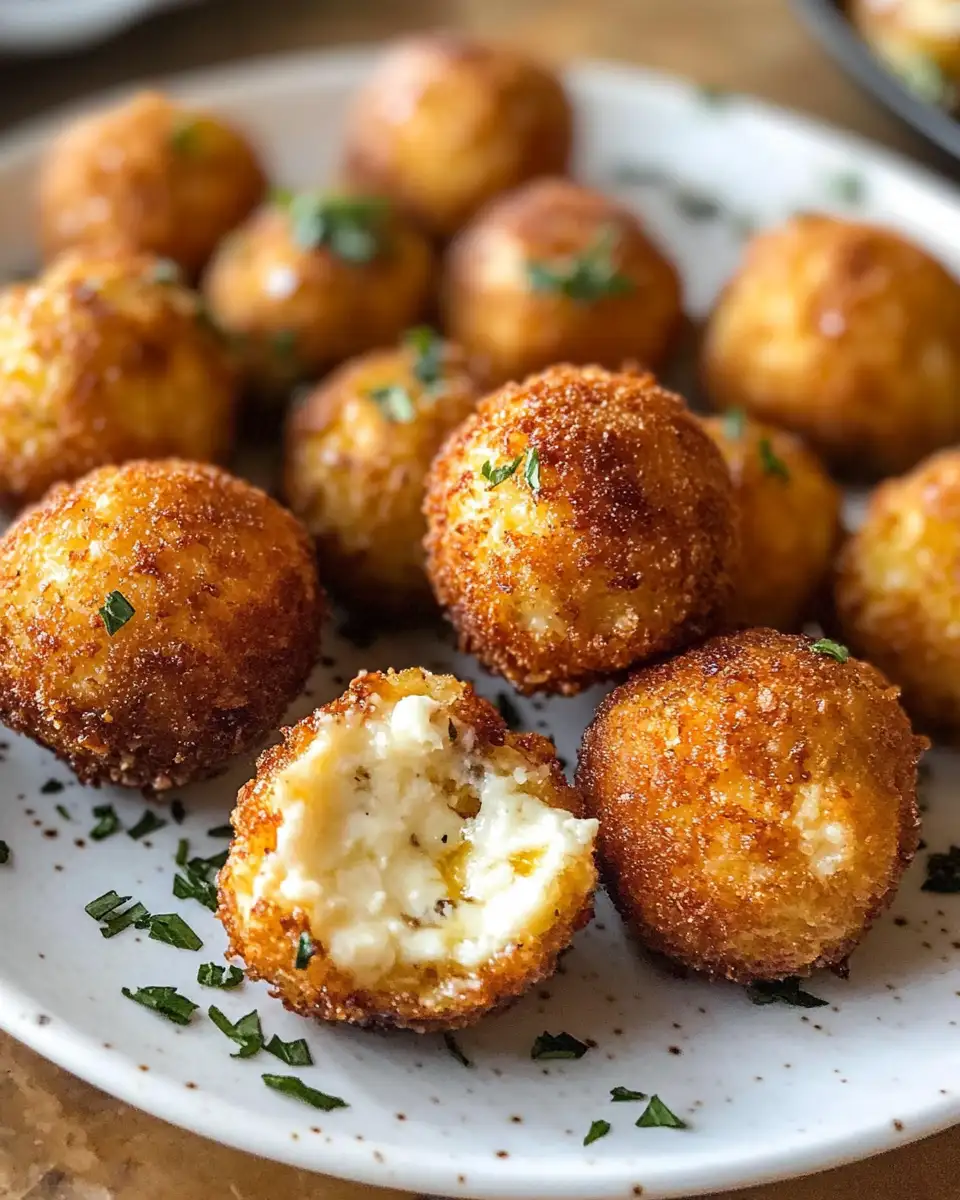
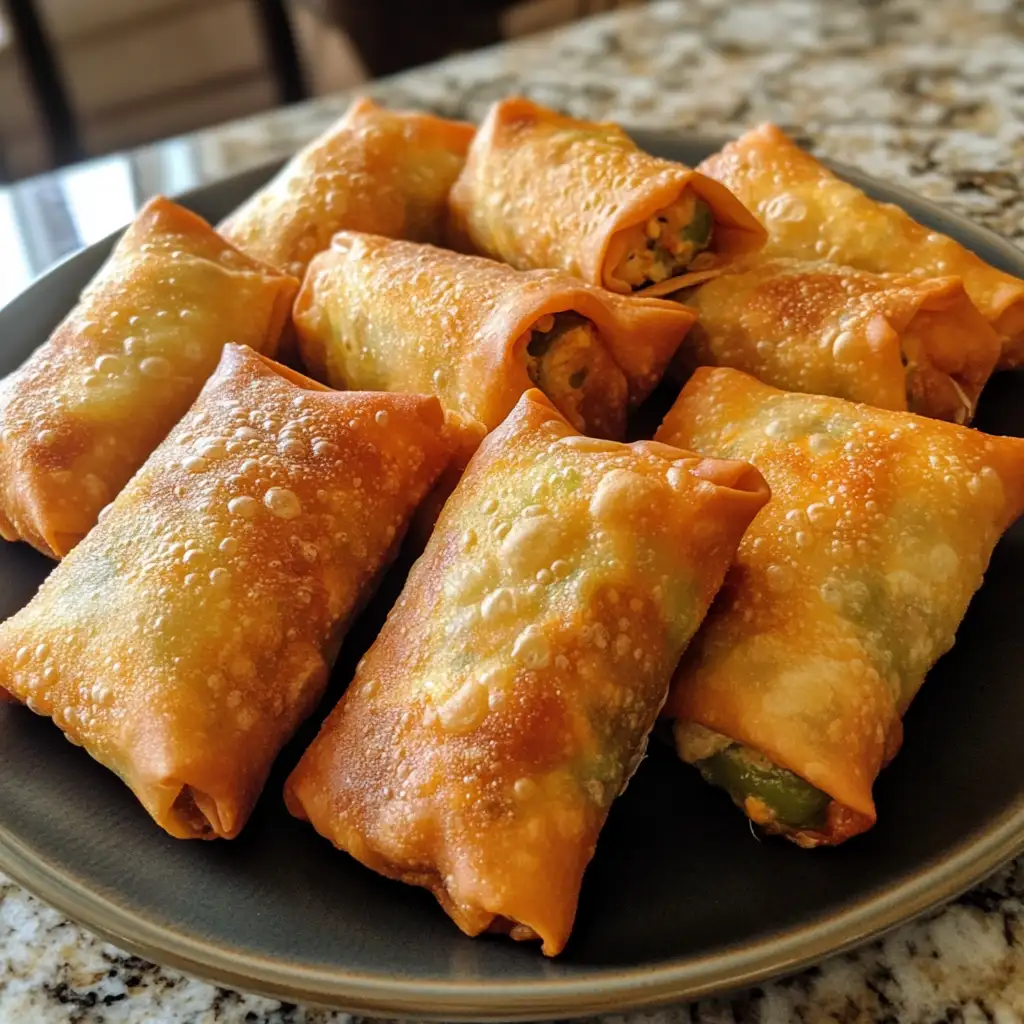
If you’ve ever found yourself savoring a dish and wishing the moment could last forever, then you’re going to adore these Fried Goat Cheese Balls. They’re a delightful blend of creamy, tangy goat cheese, wrapped in a crispy golden shell that’s as satisfying to bite into as it is to savor. As someone who grew up in a bustling Mexican-American household, where food was always a form of love and expression, I can confidently say this recipe brings that same warmth and joy to your table. Whether you’re a seasoned home cook or just beginning to explore the wonders of the kitchen, these goat cheese balls are sure to become a favorite. So, let’s get into the heart of it!
Table of Contents
Why You’ll Love This Fried Goat Cheese Balls
There’s something irresistibly comforting about fried cheese, isn’t there? These Fried Goat Cheese Balls are a symphony of textures and flavors that remind me of the lively, aromatic meals from my childhood. The contrast between the creamy center and the crispy exterior is pure culinary magic. They’re perfect as an appetizer, a party snack, or even just a treat for yourself. And the best part? They’re incredibly easy to make, capturing that essence of simple, joyful cooking that I cherish. Every bite is like a little piece of home, and I hope they bring as much joy to your kitchen as they do to mine.
Ingredients You’ll Need for This Fried Goat Cheese Balls
- 8 ounces goat cheese, softened
- 1/4 cup all-purpose flour
- 2 large eggs, beaten
- 1 cup panko breadcrumbs
- 1/2 teaspoon garlic powder
- 1/2 teaspoon paprika
- 1/4 teaspoon salt
- 1/4 teaspoon black pepper
- Vegetable oil, for frying
- Optional: honey or fig jam for drizzling
Feel free to get creative with your seasonings. A pinch of cayenne can add a nice kick, or try some finely chopped fresh herbs for an extra layer of flavor.
Nutrition Facts
- Calories: 220 per serving (2 balls)
- Protein: 8g
- Fat: 15g
- Carbohydrates: 14g
- Fiber: 1g
- Sugar: 1g
- Sodium: 250mg
These nutritional estimates will help you balance your meal planning, whether you’re indulging in these as a snack or part of a larger feast.
Print
Irresistible Fried Goat Cheese Balls: Your New Favorite Appetizer
Learn how to make delicious Fried Goat Cheese Balls. Easy recipe with step-by-step instructions.
- Total Time: 45 minutes
- Yield: 4 servings
Ingredients
- 8 ounces goat cheese, softened
- 1/4 cup all-purpose flour
- 2 large eggs, beaten
- 1 cup panko breadcrumbs
- 1/2 teaspoon garlic powder
- 1/2 teaspoon paprika
- 1/4 teaspoon salt
- 1/4 teaspoon black pepper
- Vegetable oil, for frying
- Optional: honey or fig jam for drizzling
Feel free to get creative with your seasonings. A pinch of cayenne can add a nice kick, or try some finely chopped fresh herbs for an extra layer of flavor.
Instructions
- Begin by dividing the goat cheese into small, even portions, and roll each into a ball, about the size of a large marble. Place them on a plate and freeze for about 15-20 minutes. This helps them hold their shape during frying.
- While the cheese balls are chilling, set up your breading station. Place the flour in one bowl, the beaten eggs in another, and mix the panko breadcrumbs with garlic powder, paprika, salt, and pepper in a third bowl.
- Once the cheese balls are firm, dredge each one in flour, shaking off any excess. Then, dip them into the egg, and finally, coat them thoroughly in the seasoned panko mixture.
- In a large skillet, heat about 1 inch of vegetable oil over medium heat. It’s ready when a breadcrumb sizzles and turns golden within a few seconds.
- Carefully add the goat cheese balls to the oil, frying them in batches to avoid overcrowding. Cook for 1-2 minutes on each side, or until they are golden brown and crispy.
- Using a slotted spoon, transfer the fried cheese balls to a paper towel-lined plate to drain any excess oil.
- Serve warm, drizzled with honey or fig jam if desired.
These steps are designed to make the process as smooth as possible. Remember, patience is key in frying to get that perfect crunch!
- Prep Time: 15 minutes
- Cook Time: 30 minutes
- Category: Main Dish
- Method: Cooking
- Cuisine: International
Steps to Create Your Fried Goat Cheese Balls
- Begin by dividing the goat cheese into small, even portions, and roll each into a ball, about the size of a large marble. Place them on a plate and freeze for about 15-20 minutes. This helps them hold their shape during frying.
- While the cheese balls are chilling, set up your breading station. Place the flour in one bowl, the beaten eggs in another, and mix the panko breadcrumbs with garlic powder, paprika, salt, and pepper in a third bowl.
- Once the cheese balls are firm, dredge each one in flour, shaking off any excess. Then, dip them into the egg, and finally, coat them thoroughly in the seasoned panko mixture.
- In a large skillet, heat about 1 inch of vegetable oil over medium heat. It’s ready when a breadcrumb sizzles and turns golden within a few seconds.
- Carefully add the goat cheese balls to the oil, frying them in batches to avoid overcrowding. Cook for 1-2 minutes on each side, or until they are golden brown and crispy.
- Using a slotted spoon, transfer the fried cheese balls to a paper towel-lined plate to drain any excess oil.
- Serve warm, drizzled with honey or fig jam if desired.
These steps are designed to make the process as smooth as possible. Remember, patience is key in frying to get that perfect crunch!
Tips for Making the Best Fried Goat Cheese Balls
To achieve the perfect balance of creamy and crispy, make sure to freeze the goat cheese balls before breading. This little trick, passed down from my grandmother’s wisdom, helps them stay intact during frying. Also, don’t rush the frying process; maintaining the right oil temperature is crucial for even cooking. If the oil is too hot, the coating will burn before the cheese inside has warmed through. Enjoy the process, and don’t be afraid to tweak the seasonings to match your mood or the occasion!
Serving Suggestions and Pairings
These Fried Goat Cheese Balls are incredibly versatile. Serve them as a sophisticated appetizer at your next dinner party, or pair them with a fresh salad for a light yet satisfying lunch. For a touch of sweetness, drizzle with honey or fig jam. They complement a crisp white wine beautifully or a sparkling lemonade if you’re keeping it non-alcoholic. The possibilities are endless, and each pairing can bring out different nuances in the dish!
Storage and Reheating Tips
If you have any leftovers (which is rare in my house!), store them in an airtight container in the refrigerator for up to three days. To reheat, place them in a preheated oven at 350°F for about 10 minutes until they’re warmed through and crispy again. Avoid using the microwave as it can make them soggy.
Frequently Asked Questions
What are the main ingredients for Fried Goat Cheese Balls?
The main ingredients for Fried Goat Cheese Balls include the items listed in our ingredients section above. Each ingredient plays a crucial role in achieving the perfect flavor and texture.
How long does it take to make Fried Goat Cheese Balls?
The total time to make Fried Goat Cheese Balls includes both preparation and cooking time. Check the recipe card above for exact timing details.
Can I make Fried Goat Cheese Balls ahead of time?
Yes, Fried Goat Cheese Balls can often be prepared in advance. Store it properly in an airtight container in the refrigerator and consume within the recommended timeframe.
What can I serve with Fried Goat Cheese Balls?
Fried Goat Cheese Balls pairs well with various sides and accompaniments. Consider the serving suggestions mentioned in the recipe for the best dining experience.
Is Fried Goat Cheese Balls suitable for special diets?
Depending on the ingredients used, Fried Goat Cheese Balls may be adapted for various dietary needs. Check the ingredients list and consider substitutions as needed for your dietary requirements.
Final Thoughts
These Fried Goat Cheese Balls are a testament to how simple ingredients can come together to create something truly special. They remind me of the bustling kitchen from my childhood, filled with laughter, stories, and the comforting aroma of delicious food. I hope this recipe brings a bit of that magic to your home, serving as a reminder that cooking is not just about feeding the body, but also the soul. Enjoy every bite, and remember, the best meals are the ones shared with loved ones. Happy cooking!

")