Growing up in a bustling Mexican-American household in Asheville, North Carolina, I’ve always believed that the kitchen is the heart of the home. It’s a place where flavors tell stories and meals are a canvas for creativity. Today, I want to share a recipe that’s a true comfort classic: Baked Mac and Cheese with Crispy Topping. This dish is reminiscent of the hearty, soul-warming meals my abuela used to make. Her cooking was all about love and laughter, served with a side of storytelling. Now that I live in Charleston with my husband Marco and our golden retriever Biscuit, I aim to recreate that same warmth and comfort in our home — and hopefully in yours too!
Table of Contents
Why You’ll Love This Baked Mac and Cheese with Crispy Topping
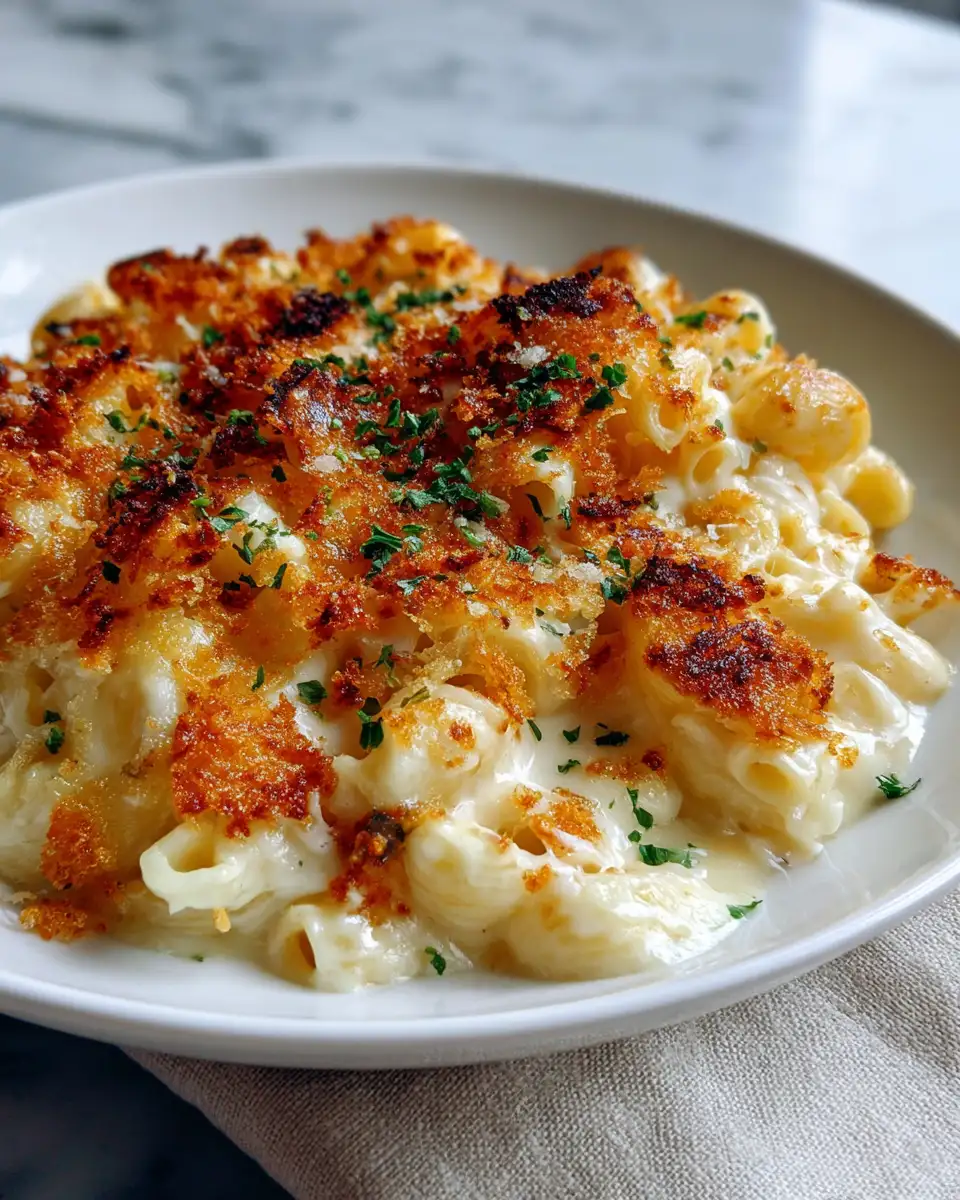
This Baked Mac and Cheese with Crispy Topping is more than just a dish; it’s a cozy embrace on a chilly evening. Imagine the creamy, cheesy goodness meeting the crunchy, golden topping — a delightful contrast that makes each bite a little piece of heaven. Inspired by the simplicity of my childhood meals, this recipe is perfect for busy weeknights or when you’re just craving something special. It’s easy to prepare, using ingredients you probably already have in your pantry. Plus, it’s a crowd-pleaser that even the pickiest eaters will love. This dish is a testament to my belief that cooking should be joyful and accessible to everyone, regardless of skill level.
Ingredients You’ll Need for This Baked Mac and Cheese with Crispy Topping

- 1 pound elbow macaroni
- 2 tablespoons unsalted butter
- 2 tablespoons all-purpose flour
- 2 cups milk (whole or 2% works best)
- 2 cups shredded sharp cheddar cheese
- 1 cup grated Parmesan cheese
- 1 teaspoon salt
- 1/2 teaspoon black pepper
- 1/2 teaspoon paprika
- 1 cup panko breadcrumbs
- 2 tablespoons olive oil
If you’re out of sharp cheddar, feel free to swap it with Monterey Jack or even a mix of cheeses you love. The key is to make it your own, just like my grandmother taught me — cooking from the heart, not the book.
Nutrition Facts
- Calories: 450 per serving
- Protein: 18g
- Fat: 22g
- Carbohydrates: 52g
- Fiber: 2g
- Sugar: 4g
- Sodium: 620mg

Ultimate Baked Mac and Cheese with Irresistibly Crispy Topping
Learn how to make delicious Baked Mac and Cheese with Crispy Topping. Easy recipe with step-by-step instructions.
- Total Time: 45 minutes
- Yield: 4 servings
Ingredients
- 1 pound elbow macaroni
- 2 tablespoons unsalted butter
- 2 tablespoons all-purpose flour
- 2 cups milk (whole or 2% works best)
- 2 cups shredded sharp cheddar cheese
- 1 cup grated Parmesan cheese
- 1 teaspoon salt
- 1/2 teaspoon black pepper
- 1/2 teaspoon paprika
- 1 cup panko breadcrumbs
- 2 tablespoons olive oil
If you’re out of sharp cheddar, feel free to swap it with Monterey Jack or even a mix of cheeses you love. The key is to make it your own, just like my grandmother taught me — cooking from the heart, not the book.
Instructions
- Preheat your oven to 350°F (175°C) and grease a 9×13-inch baking dish.
- Cook the elbow macaroni according to the package instructions until al dente. Drain and set aside.
- In a medium saucepan, melt the butter over medium heat. Stir in the flour and cook for about 1 minute to form a roux.
- Gradually whisk in the milk, ensuring there are no lumps. Continue cooking, stirring constantly, until the mixture thickens, about 5 minutes.
- Reduce the heat to low. Stir in the cheddar and Parmesan cheeses, salt, pepper, and paprika until smooth and creamy.
- Combine the cooked macaroni with the cheese sauce, mixing until well coated. Pour the mixture into the prepared baking dish.
- In a small bowl, mix the panko breadcrumbs with olive oil. Sprinkle evenly over the macaroni and cheese.
- Bake in the preheated oven for 20-25 minutes, or until the topping is golden and crispy.
- Let it cool slightly before serving. Enjoy the cheesy, crunchy masterpiece!
- Prep Time: 15 minutes
- Cook Time: 30 minutes
- Category: Main Dish
- Method: Cooking
- Cuisine: International
Steps to Create Your Baked Mac and Cheese with Crispy Topping
- Preheat your oven to 350°F (175°C) and grease a 9×13-inch baking dish.
- Cook the elbow macaroni according to the package instructions until al dente. Drain and set aside.
- In a medium saucepan, melt the butter over medium heat. Stir in the flour and cook for about 1 minute to form a roux.
- Gradually whisk in the milk, ensuring there are no lumps. Continue cooking, stirring constantly, until the mixture thickens, about 5 minutes.
- Reduce the heat to low. Stir in the cheddar and Parmesan cheeses, salt, pepper, and paprika until smooth and creamy.
- Combine the cooked macaroni with the cheese sauce, mixing until well coated. Pour the mixture into the prepared baking dish.
- In a small bowl, mix the panko breadcrumbs with olive oil. Sprinkle evenly over the macaroni and cheese.
- Bake in the preheated oven for 20-25 minutes, or until the topping is golden and crispy.
- Let it cool slightly before serving. Enjoy the cheesy, crunchy masterpiece!
Tips for Making the Best Baked Mac and Cheese with Crispy Topping
To make this dish truly unforgettable, remember to cook the pasta just until al dente, as it will continue to cook in the oven. For an extra kick, you can add a pinch of cayenne pepper or a dash of hot sauce to the cheese sauce. My abuela always said, “A little spice never hurt anyone!” If you’re feeling adventurous, mix in cooked bacon bits or sautéed onions for added depth of flavor. And don’t skip the breadcrumb topping — it adds a satisfying crunch that takes this classic to the next level.
Serving Suggestions and Pairings

This Baked Mac and Cheese with Crispy Topping is a versatile dish that pairs well with just about anything. Serve it alongside a fresh, crisp salad or some roasted veggies for a well-rounded meal. If you’re hosting friends, pair it with a light white wine, like a Chardonnay or Pinot Grigio, to balance the richness of the cheese. For a heartier meal, serve it with grilled chicken or steak. Remember, the goal is to nourish both body and soul, so choose sides that make you happy!
Storage and Reheating Tips
Leftovers can be a lifesaver during busy weeks. Store the baked mac and cheese in an airtight container in the refrigerator for up to 3 days. To reheat, cover with foil and bake in a 350°F (175°C) oven until warmed through. You can also microwave individual portions, but the oven method will help retain that delightful crunch. If the pasta seems a bit dry, stir in a splash of milk before reheating.
Frequently Asked Questions
What are the main ingredients for Baked Mac and Cheese with Crispy Topping?
The main ingredients for Baked Mac and Cheese with Crispy Topping include the items listed in our ingredients section above. Each ingredient plays a crucial role in achieving the perfect flavor and texture.
How long does it take to make Baked Mac and Cheese with Crispy Topping?
The total time to make Baked Mac and Cheese with Crispy Topping includes both preparation and cooking time. Check the recipe card above for exact timing details.
Can I make Baked Mac and Cheese with Crispy Topping ahead of time?
Yes, Baked Mac and Cheese with Crispy Topping can often be prepared in advance. Store it properly in an airtight container in the refrigerator and consume within the recommended timeframe.
What can I serve with Baked Mac and Cheese with Crispy Topping?
Baked Mac and Cheese with Crispy Topping pairs well with various sides and accompaniments. Consider the serving suggestions mentioned in the recipe for the best dining experience.
Is Baked Mac and Cheese with Crispy Topping suitable for special diets?
Depending on the ingredients used, Baked Mac and Cheese with Crispy Topping may be adapted for various dietary needs. Check the ingredients list and consider substitutions as needed for your dietary requirements.
Final Thoughts
Cooking is more than a chore; it’s an expression of love and creativity. This Baked Mac and Cheese with Crispy Topping is a dish that brings people together, much like the meals I cherished with my family growing up. It’s about creating memories, sharing stories, and enjoying the simple pleasures of life. Whether you’re a seasoned cook or just starting your culinary journey, I hope this recipe brings joy to your table and inspires you to explore the world of flavors with an open heart and a curious palate.
Happy cooking, Sofia 🍴


")