There’s something magical about the aroma of a freshly baked Breakfast Cheese Danish wafting through the kitchen on a lazy weekend morning. As I sit here, sipping my cup of coffee and watching Biscuit, our golden retriever, lounge in a sunny spot by the window, I can’t help but reminisce about the bustling mornings back in my childhood home in Asheville. The kitchen was always the heart of our home, filled with laughter and the irresistible smell of homemade treats. Today, I want to share with you a recipe that captures that essence of warmth and comfort: a delectable Breakfast Cheese Danish that’s as simple to make as it is delightful to eat.
Table of Contents
Why You’ll Love This Breakfast Cheese Danish
Creating a Breakfast Cheese Danish may sound like a task reserved for seasoned bakers, but trust me, it’s well within reach for everyone. This recipe is a nod to the simple yet flavorful dishes I grew up with, where the quality of ingredients and a touch of love make all the difference. The flaky pastry combined with a creamy, slightly tangy cheese filling is a symphony of textures and tastes that will transport you straight to a European café, even if you’re just in your own kitchen in Charleston. Plus, it’s a versatile recipe that can be adapted to suit your taste or what you have on hand, making it perfect for those spontaneous baking sessions that my abuela always inspired.
Ingredients You’ll Need for This Breakfast Cheese Danish

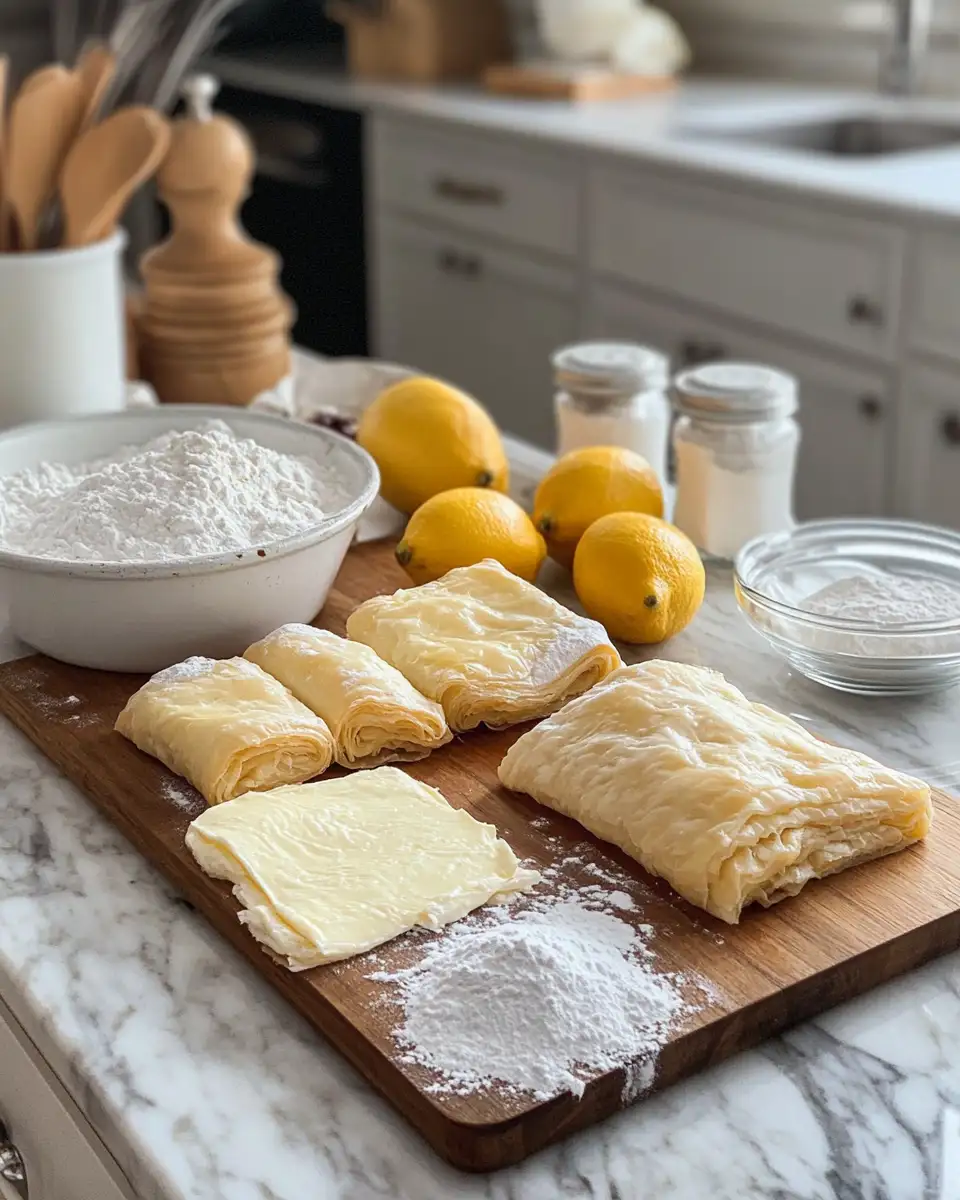
- 1 package (17.3 ounces) of frozen puff pastry, thawed
- 8 ounces cream cheese, softened
- 1/3 cup granulated sugar
- 1 teaspoon vanilla extract
- 1 large egg yolk
- Zest of 1 lemon
- 1 tablespoon all-purpose flour
- 1 large egg, beaten (for egg wash)
- 2 tablespoons powdered sugar (for dusting)
- Optional: 1/4 cup fruit preserves or jam of your choice
Nutrition Facts
- Calories: 420 per serving
- Protein: 7g
- Fat: 27g
- Carbohydrates: 39g
- Fiber: 1g
- Sugar: 14g
- Sodium: 240mg

Irresistible Morning Delight: Perfecting the Art of the Breakfast Cheese Danish
Learn how to make delicious Breakfast Cheese Danish. Easy recipe with step-by-step instructions.
- Total Time: 45 minutes
- Yield: 4 servings
Ingredients
- 1 package (17.3 ounces) of frozen puff pastry, thawed
- 8 ounces cream cheese, softened
- 1/3 cup granulated sugar
- 1 teaspoon vanilla extract
- 1 large egg yolk
- Zest of 1 lemon
- 1 tablespoon all-purpose flour
- 1 large egg, beaten (for egg wash)
- 2 tablespoons powdered sugar (for dusting)
- Optional: 1/4 cup fruit preserves or jam of your choice
Instructions
- Preheat your oven to 400°F (200°C) and line a baking sheet with parchment paper.
- In a medium bowl, blend the cream cheese, granulated sugar, vanilla extract, egg yolk, lemon zest, and flour until smooth and creamy. This reminds me of the times I spent mixing ingredients with my abuela, learning the importance of patience and consistency.
- Unroll the thawed puff pastry on a lightly floured surface. If you’re like me and always have a curious pet nearby, be sure to keep an eye out for wandering paws!
- Cut the pastry into 4-inch squares. You should have roughly 8 squares per sheet.
- Spoon a heaping tablespoon of the cream cheese mixture into the center of each square. If you’re feeling adventurous, add a small dollop of fruit preserves on top of the cheese filling.
- Fold each corner of the pastry square toward the center, pressing gently to seal. This folding technique is a nod to the artistic flair my grandmother always encouraged in the kitchen.
- Brush the edges of each Danish with the beaten egg to ensure a golden-brown finish.
- Place the pastries on the prepared baking sheet and bake for 15-18 minutes, or until they are puffed and golden brown.
- Once baked, let them cool slightly before dusting with powdered sugar for a touch of sweetness.
- Prep Time: 15 minutes
- Cook Time: 30 minutes
- Category: Main Dish
- Method: Cooking
- Cuisine: International
Steps to Create Your Breakfast Cheese Danish
- Preheat your oven to 400°F (200°C) and line a baking sheet with parchment paper.
- In a medium bowl, blend the cream cheese, granulated sugar, vanilla extract, egg yolk, lemon zest, and flour until smooth and creamy. This reminds me of the times I spent mixing ingredients with my abuela, learning the importance of patience and consistency.
- Unroll the thawed puff pastry on a lightly floured surface. If you’re like me and always have a curious pet nearby, be sure to keep an eye out for wandering paws!
- Cut the pastry into 4-inch squares. You should have roughly 8 squares per sheet.
- Spoon a heaping tablespoon of the cream cheese mixture into the center of each square. If you’re feeling adventurous, add a small dollop of fruit preserves on top of the cheese filling.
- Fold each corner of the pastry square toward the center, pressing gently to seal. This folding technique is a nod to the artistic flair my grandmother always encouraged in the kitchen.
- Brush the edges of each Danish with the beaten egg to ensure a golden-brown finish.
- Place the pastries on the prepared baking sheet and bake for 15-18 minutes, or until they are puffed and golden brown.
- Once baked, let them cool slightly before dusting with powdered sugar for a touch of sweetness.
Tips for Making the Best Breakfast Cheese Danish
To achieve the perfect balance of flavors, ensure your cream cheese is at room temperature before mixing; this prevents lumps and creates a smoother filling. Don’t be afraid to experiment with different fruit preserves — raspberry, apricot, or even a homemade compote can elevate your Danish to new heights. And remember, baking is as much about intuition as it is about precision, a lesson passed down from my family’s kitchen where recipes were often guided by senses rather than scales.
Serving Suggestions and Pairings

These Breakfast Cheese Danishes are best enjoyed fresh out of the oven with a steaming cup of coffee or a tall glass of orange juice. For a delightful brunch spread, serve them alongside a fresh fruit salad or scrambled eggs. The combination of textures and flavors will transport you to a leisurely morning in a sunny café, even if you’re still in your pajamas at home. Sharing these pastries with loved ones is a beautiful way to start the day and create lasting memories, much like the ones I cherish from my family’s breakfast table.
Storage and Reheating Tips
If you have any leftovers, store them in an airtight container in the refrigerator for up to three days. To reheat, simply pop them in a preheated oven at 350°F (175°C) for about 5-7 minutes to refresh their flakiness. I recommend avoiding the microwave as it can make the pastry soggy — a tip I learned the hard way during one of my early baking attempts!
Frequently Asked Questions
What are the main ingredients for Breakfast Cheese Danish?
The main ingredients for Breakfast Cheese Danish include the items listed in our ingredients section above. Each ingredient plays a crucial role in achieving the perfect flavor and texture.
How long does it take to make Breakfast Cheese Danish?
The total time to make Breakfast Cheese Danish includes both preparation and cooking time. Check the recipe card above for exact timing details.
Can I make Breakfast Cheese Danish ahead of time?
Yes, Breakfast Cheese Danish can often be prepared in advance. Store it properly in an airtight container in the refrigerator and consume within the recommended timeframe.
What can I serve with Breakfast Cheese Danish?
Breakfast Cheese Danish pairs well with various sides and accompaniments. Consider the serving suggestions mentioned in the recipe for the best dining experience.
Is Breakfast Cheese Danish suitable for special diets?
Depending on the ingredients used, Breakfast Cheese Danish may be adapted for various dietary needs. Check the ingredients list and consider substitutions as needed for your dietary requirements.
Final Thoughts
Baking a Breakfast Cheese Danish is more than just creating a delicious treat; it’s about bringing a piece of warmth and tradition into your home. Whether you’re sharing it with family or savoring a quiet moment alone, this Danish embodies the simple joy of homemade goodness. As you bite into its flaky layers and creamy filling, I hope it brings a smile to your face and a sense of connection, much like the meals that have always brought my family together. Happy cooking, and may your kitchen always be filled with laughter and love.


